Archives for February 2012

An Easy Bread Machine Recipes for the Career Oriented Professional

When I was in high school, we had a baking class and we had to bring all the necessary ingredients. We were formed into groups and assigned the different ingredients for the bread recipe. Unlike today bread machine recipes are very popular. I remember I always raised my hand to volunteer for the yeast as it was the least expensive (my mother had already bought a small can that would serve for the whole semester) and the others would bring the rest, taking turns in bringing the flour. I never understood why they didn’t just leave the whole sack of flour in the kitchen pantry. I guess it was because of the times… and the mice. Anyway, I remember we would first prepare the yeast for fermentation. That is, adding a teaspoon to a small bowl filled with about 1/4 cup of warm water, half hot and half cold, and sprinkling some sugar to aid the proofing. If the water was too hot, it would kill the yeast; and if it was too cold, it did not stimulate it leaving it flat and out. The yeast would be ready when it had already multiplied into a regular colony; it usually took about 5 minutes. If after the prescribed period nothing happened, then the baking teacher would tell us to throw it away as either the water was too hot or too cold and proceed to read the expiration date on the can of yeast that I brought. After a few trials, we had the hang of it.

Yeast is the leavening agent for most bread. It is what makes the dough rise and gives it that airy texture because yeast interacts with the sugar and produces good gaseous carbon dioxide bubbles. Anyway, times are so very different now. There’s still yeast, but the preparation time has gone since the world was introduced to the Bread Machine Recipes. The first time I used one, I was sort of sad because I missed watching the yeast grow. But then I got so busy that I finally appreciated the fact that it existed. Here is an Easy Bread Machine Recipes for all my fellow busy career people. Craft on!

Ingredients:

– 1 cup of warm water for the yeast to ferment nicely
– 3 tablespoons of white sugar
– 1 1/2 teaspoons of salt
– 3 tablespoons of palm oil
– 3 cups of bread flour
– 2 teaspoons of active dry yeast

Directions:

– Place the water, sugar, salt, oil, bread flour and yeast into the pan of the bread machine.
– Bake on White Bread setting.
– Cool on wire racks before slicing.
Pin It

A Banana Bread Recipe from Veganville

Vegan margarine is a butter substitute which is typically composed of oils extracted from vegetables. Whereas butter is derived from the milk of animals, margarine is derived from plant fats. It is also known as “partially hydrogenated vegetable oil”. Most margarines nowadays have been fortified with vitamins such as Vitamin A, B1 and B3 and even Vitamin C. Vegan margarines boast of high fiber nutrients and very low cholesterol count. The human body needs only a little over 1 gram in cholesterol and this is already accounted for by liver production. Any excess cholesterol brought about by our food intake is deposited in the arteries and blood vessels that can be constricted due to cholesterol blockages. It is, therefore, very important that we minimize the cholesterol count in our diets. Having enumerated the importance of low-fat, low cholesterol intakes, here then is a delicious vegan banana bread recipe that can help to maintain our good health without depriving ourselves of the natural delicious and tasty treat.

Of course, bar none, the most nutritious diets are always found in the raw uncooked fruits and vegetables. But if you are itching for a baked goodie, then have some of this Vegan Banana Bread Recipe.

Ingredients:

– 1/3 cup of vegan margarine
– 1/2 cup sugar
– 2 cups flour
– 1 1/2 tsp baking powder
– 1/2 tsp baking soda
– 2 ripe bananas, mashed
– 1/2 cup soy milk
– 1 tsp vanilla
– 1/2 cup chopped walnuts (optional)

Preparation:

– Preheat the oven to 350 degrees F.
– Cream together the vegan margarine and sugar, then stir in the flour, baking powder and baking soda.
– Add the remaining ingredients and mix well.
– Pour into an oiled bread pan and bake for about an hour or just until the cake springs back when lightly touched (caution: be careful not to burn your arm in the oven!)
– Remove from the oven and cool for about 10 minutes.
– Remove the cake from the baking pan and let cool completely on a wire rack.
– Serve with a hot cup of your preferred green, black or white tea leaves – boiled just enough to extract the flavor; squeeze a slice of lemon to complete this perfectly healthy combination.
– Optional: You may frost the cake with your favorite vegan frosting recipe. Just make sure all the frosting ingredients are vegan-based, otherwise a corrupted non-vegan ingredient will defeat the purpose of the whole endeavor. Good luck and happy baking!

Pin It

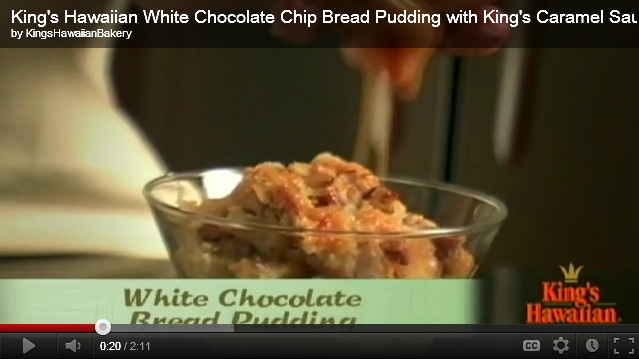
Classic White Chocolate Bread Pudding Recipe

If you want to have an everlasting love for chocolate and want to turn it into a delicious dessert in no time at all, then here is a simple and delicious white chocolate bread pudding recipe with white chocolate ganache that you can make at home and serve warm or cold. It is a classic bread pudding recipe and you cannot go wrong with it.

Ingredients:

– 6 cups heavy whipping cream
– 2 cups milk (use full cream milk)
– 1 cup white sugar
– 2 1/2 cups white chocolate (cut in pieces or grated)
– 4 eggs
– 15 egg yolks
– 24-inch french loaf bread (a day or two old)
– 1 teaspoon grated cinnamon

Instructions:

– Cut the bread in small cubes or triangles and remove the sides.
– Preheat the oven to 275F.
– Put the bread cubes on a baking sheet and bake them for about 15 minutes until lightly toasted.
– Remove and let cool.
– In the meantime, increase the oven temperature to 350F.
– In a large saucepan, take the cream, milk, sugar and grated cinnamon. Heat on medium heat and bring to boil then let it simmer for 2 minutes.
– Remove from heat and add the grated white chocolate to the hot mix.
– Let the chocolate dissolve completely and stir until you get a smooth pudding. Set aside.
– In a separate bowl, whisk the eggs and egg yolks together.
– Pour the hot chocolate mix in the egg mix in a steady stream and keep mixing continuously. Your pudding for the bread is ready to use.
– Take a 9×12 inch glass bowl and grease the insides with a little butter.
– Arrange half of the bread cubes at the bottom of the bowl and pour half of the chocolate-egg mix on top of it.
– Press the bread cubes lightly using your fingertips or a spatula to let the bread cubes soak the pudding.
– Line the rest of the bread cubes on the top and pour the remaining pudding over them.
– Cover the dish with aluminum foil and bake in the preheated oven for about an hour.
– Remove the foil and bake for another 30 minutes to let the top get golden brown.

For the Chocolate Ganache

Ingredients:

– 1/2 cup heavy whipping cream
– 1 cup white chocolate chips
– 1/4 cup grated dark chocolate

Instructions:

– Bring the cream to the boil in a pan.
– Remove from the heat and stir in the white chocolate chips. Keep stirring until smooth.
– Remove the bread pudding from the oven and serve topped with chocolate ganache and grated dark chocolate.

Pin It

Simple Low Carb Bread Machine Recipe

Low carb is the new fad of the day. Eating a low carb diet enables you to have a healthy life, it helps lower your cholesterol level and makes you feel full longer. For those who are on a diet plan and want to lose weight, it is important to include low carb bread machine recipes in their list. Instead of buying low carb bread from the market, you can make fresh bread at home by following this simple low carb bread machine recipe.

Ingredients:

– 1 packet dry yeast (active bread machine yeast)
– 1/2 teaspoon sugar (to help the yeast rise)
– 1 1/8 cups warm water (100F)
– 3 tablespoons olive oil
– 1 1/2 teaspoons baking powder
– 1 teaspoon salt
– 1 tablespoon splenda (low cal sugar)
– 1 cup gluten free wheat flour
– 1/4 cup oat flour
– 3/4 cup soy flour
– 1/4 cup flax seed meal
– 1/4 cup unprocessed wheat barn

Instructions:

– Read the instructions on your bread machine carefully and make sure that you understand the settings.
– Clean out the bread machine water pan.
– Pour the yeast in the pan.
– Add the sugar and water on top of it. Stir a little and let it sit for a while. You will notice that the yeast will start bubbling. If it does not bubble that means that the yeast is dead. You will have to throw away the dead yeast and start with a new packet.
– Sift the dry ingredients in a bowl and mix together.
– Add the olive oil on top and pour the dry ingredients in the bread machine pan.
– Set the machine to the basic cycle and let it bake for 3-4 hours.
– Let the bread cool for some time in the pan before taking it out of the pan.
– Cool and cut in slices to serve.
– This bread can be used as a sandwich wrapper or you can just enjoy it with low fat butter. It also makes a great toast.

Here are some variations that you can add to this bread:

– 2 tablespoons of sunflower seeds.
– 2 tablespoons of sesame seeds.
– You can substitute oat and soy flour with rye flour too if you want.

Notes:

– The sugar is needed for activating the yeast and does not add any extra calories to the bread.
– If your bread machine requires special settings for gluten free bread then make sure you follow the instructions to the letter otherwise the bread will not turn out the way you want it.

Pin It

Bananas and Gluten Free Diet, a Banana Bread Recipe

Gluten, according to the Merriam Webster online dictionary, is “a tenacious (not easily pulled apart) elastic protein substance especially of wheat flour that gives cohesiveness to dough”. Gluten is the sticky element of grains such as wheat barley, rye and even grass. Gluten, once separated from wheat, contains small amounts of fat, moisture and ash. This food is very low in saturated fat, cholesterol and sodium. It is also a good source of selenium, and a very good source of protein. However, gluten does not go very well for people with Coeliac Disease, or an auto-immune disease that may be genetic and causes chronic diarrhea and other bowel problems. A lot of people actually suffer from this ailment and, therefore, a lot of banana bread recipe have been concocted in their favor; most notable are gluten free banana bread recipe that consider the celiac diet but retain the value of high fiber.

Basically, recipes of this kind contain gluten-free flour, such as rice flour. These also contain high fiber and the sticky, cohesive substance found in wheat and other glutinous grains, yet do not contain the proteins that trigger the symptoms of Coeliac Disease that hinder the absorption of nutrients by the body. This recipe is a must-try and later on must-have staple in the pantry for people diagnosed with the auto-immune disease. Kindly remember, this is still a tasty treat and all other accoutrements can still apply when serving this deliciously healthy diet food. Slathered with your choice of spread or taken alone with your favorite drink, you can continue to enjoy good health with good food.

Ingredients:

– 2 cups gluten-free all-purpose flour
– 1 teaspoon baking powder
– 1/4 teaspoon salt
– 4 fresh eggs
– 2 cups mashed ripe saba bananas (4-5 medium pcs.)
– 1 cup sugar
– 1/2 cup unsweetened applesauce
– 1/3 cup canola oil
– 1 teaspoon vanilla extract
– 1/2 cup chopped cashew nuts

Directions:

– In a large ceramic bowl, combine the flour, baking soda and salt.
– In a smaller ceramic bowl, beat the eggs and then add the bananas, sugar, applesauce, oil and vanilla.
– Beat with a hand mixer on medium speed.
– Gradually add the dry ingredients until thoroughly mixed.
– Transfer into two 8-inch loaf pans lightly coated with cooking spray.
– Bake at 350°F for 30 minutes or until a toothpick inserted near the center comes out clean.
– Cool for 10 minutes before removing from the pans to wire racks. This recipe yields 2 delicious loaves.

Pin It

Appetizing Sausage Bread Recipe

I normally do not eat pork because of the high cholesterol and fat factor. So, when I take recipes and craft these into meals, I always substitute the pork for either fish or chicken. This sausage bread recipe is no exception. Although I love fish sausages per se, I do not recommend using that ingredient in this next bread recipe – instead, we will use chicken, turkey, or (forget your cholesterol count for now) beef.

This heavy and filling sausage bread recipe is a meal in itself. It’s got the basic ingredients of pizza, including the dough. It is also quite versatile as you can add your favorite vegetable such as carrot, cabbage, bell pepper and the like, as long as the end product will not require storage of more than a couple of hours. In other words, if served and consumed immediately, then you can expand the array of ingredients and add all that your heart desires. In the meantime, let’s stick to the basics; you can experiment more on the filling combination later on.

As I mentioned earlier, this sausage bread recipe has the fixings for a pizza except the sauce, which, as a matter of fact, is also optional for future preparations. Also, in place of the tomato sauce, basil and paprika flavors, the outcome will have a more garlicky and smoked flavor and aroma.

Ingredients:

– half a kilo of ground beef or chicken or turkey sausages
– 3 cloves of garlic, minced
– 1 small onion, chopped finely
– 1 tablespoon of olive oil
– 300 grams of refrigerated pizza dough
– 1 and 1/2 cups of shredded cheeses

Method:

– Remove the sausages from the skin.
– Sauté the garlic and onions in olive oil. Add the removed sausage stuffing. Cook until almost done and drain in a strainer or press with paper towels.
– Unroll the frozen dough and shape into a rectangle on a lightly buttered baking sheet.
– Sprinkle evenly with sausage and the cheeses.
– Roll the dough into a jelly–roll style and pinch the ends so the filling is secured.
– With the seam of the roll facing down, cut crosses on top of the dough with a sharp knife.
– Heat the oven to 350°F. Bake the dough for about 30 minutes or until golden brown.
– Remove from the oven and let stand to cool for about 10 minutes or so, then slice diagonally for better presentation.

As in all bread products, this goes well with soft cream cheese slathered on it for a more delectable taste. Bon appetite!

Pin It

Versatile Indian Fry Bread Recipe

The Indian Fry Bread Recipe roots from the Native American Indians, particularly the Navajo tribe. For those who have not yet tried this particular bread recipe, the texture is just like that of a decadent French croissant but round and not shaped like a shell. It’s thin and wafer-like on the outside and thick and kind of dense on the inside. Unlike most bread, this one isn’t baked in the oven, but fried like a doughnut (except without the hole). For those who are familiar with dim sum making, the process is quite similar. The batter is sticky and thick enough to handle and shape (using floured hands) but not quite like dough. It is bread but it doesn’t use yeast.
Let’s try this, shall we?

Ingredients:

– 1 cup all-purpose flour
– 1/4 teaspoon iodized salt
– 1 teaspoon sugar
– 1 teaspoon baking powder
– 1/2 cup cold water
– Vegetable oil for deep frying
– Extra flour for hands

Method:

– Sift together the dry ingredients: flour, salt, sugar and baking powder, in a large bowl.
– Add the cold water to the mixture until well blended.
– Form the mixture into a ball using your hands which have been lightly coated with the extra flour. Do not knead.
– Divide the balled mixture into smaller balls.
– Flatten each ball with a rolling pin to about the thickness of thin-crust pizza dough (approximately half a centimeter). You should have 4 saucer-sized pieces of flattened dough or more depending on the size of your deep fryer.
– Heat the oil in a deep fryer to about 350 degrees. (If you don’t have a kitchen thermometer, you can do the ‘flour test’ by sprinkling flour on the oil; if it sizzles, then the oil is ready.)
– Deep fry the dough, one piece at a time so that they won’t stick together, until golden brown.
– Drain on paper towels and serve hot.

The Indian Fry Bread is simple enough to make but very, very versatile. It is, after all, bread. Serving suggestions vary to wit:
– top with regular or powdered sugar sprinkled
– use as your basic taco shell with taco filling
– top with your favorite pizza toppings
– top with your favorite jelly or jam
– top with grated quick-melt cheese
– serve as chicken, tuna or blt sandwich
– eat as a stand alone snack
– use as side bread for pasta dishes and salads
– serve like a bagel with cream cheese
– spread creamy butter on top and sprinkle with ground nuts
– cut into cubes and use as croutons for shrimp and bean sprout salad
– let your imagination soar and Bon Appetit!

Pin It

Coffee-Banana Bread Muffin Recipe with Icing

Waking up to the warm smell of freshly baked muffins in the air is every child’s dream. As adults also we love the smell of yummy muffins in the air and it tantalizes our taste buds like nothing else does. You can also try some banana bread recipe like this delicious muffins at home in no time at all by following this coffee-banana bread muffin recipe.

Ingredients: (This recipe will make 12 muffins.)

– 3 to 4 ripe and mashed bananas (more bananas make the muffins more moist)
– 1/3 cup melted butter
– 3/4 cup sugar
– 1 egg
– 1 teaspoon vanilla essence
– 1 tablespoon espresso
– 1 1/2 cups flour
– 1 cup chopped walnuts
– 1 teaspoon baking powder

Method:

– Grease and flour 12 muffin molds.
– Preheat the oven to 350F.
– In a large mixing bowl, take the butter and mashed bananas and mix them using a wooden spoon.
– In a small bowl, beat the egg till fluffy.
– Pour the egg in the butter-banana mix and mix well.
– Add the sugar, espresso and vanilla and mix all the ingredients together.
– In a separate bowl, add the flour, baking powder and walnuts and mix together well.
– Add the dry ingredients to the wet ingredients and mix until well incorporated.
– Pour in the muffin molds (fill only 3/4 cup) and bake in the preheated oven for 25-30 minutes.
– Cool for about 20 minutes before taking out of the mold and storing.

You can also try out various icings on the muffins to add more to the taste. Here are some icing options that you can use.

Passion fruit glace icing

Ingredients:

– 1 cup icing sugar
– 1 1/2 tablespoons passion fruit pulp

Method:

– Add the pulp to the icing sugar and whisk together well.
– Drizzle over the baked muffins and set them aside to cool before serving.

Browned butter frosting

Ingredients:

– 1/3 cup butter
– 3 cups powdered sugar
– 1 teaspoon vanilla
– 4 tablespoons milk

Method:

– In a saucepan, heat the butter and keep stirring until light brown in color.
– Remove from heat and cool.
– Mix the butter, powdered sugar and vanilla.
– Add 3 tablespoons of milk and combine well. If you find that the frosting is not very easy to spread then add the rest of the milk and mix.
– Spread the frosting over the muffins and set aside to cool.
– Decorate each muffin with sliced banana before serving.

Honey icing:

– 1 cup icing sugar
– 3 1/2 tablespoons butter
– 2 tablespoons honey
– 1 tablespoon milk

Method:

– Use an electric blender to blend together the icing sugar, butter, honey and milk to a spreading consistency.
– Spread over the baked muffins to serve.
– You can also crumble some cookies over it for more appeal.

Pin It
Privacy Policy